I spent twelve years behind the counter of a local bike shop, turning wrenches and explaining to well-meaning parents why that "great deal" on a second-hand, non-branded rear seat was actually a disaster waiting to happen. Now, as a parenting journalist, I see the same mistakes popping up in neighborhood parks and on bike paths. We obsess over the bike's frame weight and the color of the jersey, but when it comes to the most precious cargo, we sometimes let the basics slide.
Let’s get one thing straight before we talk about equipment: Can your baby hold their head up for the whole ride? I don’t mean for thirty seconds while they’re distracted by a butterfly. I mean for the duration of a commute, over bumps, and during a potential nap. If the answer is no, the bike seat is not for them yet.
The Golden Rule of the Harness
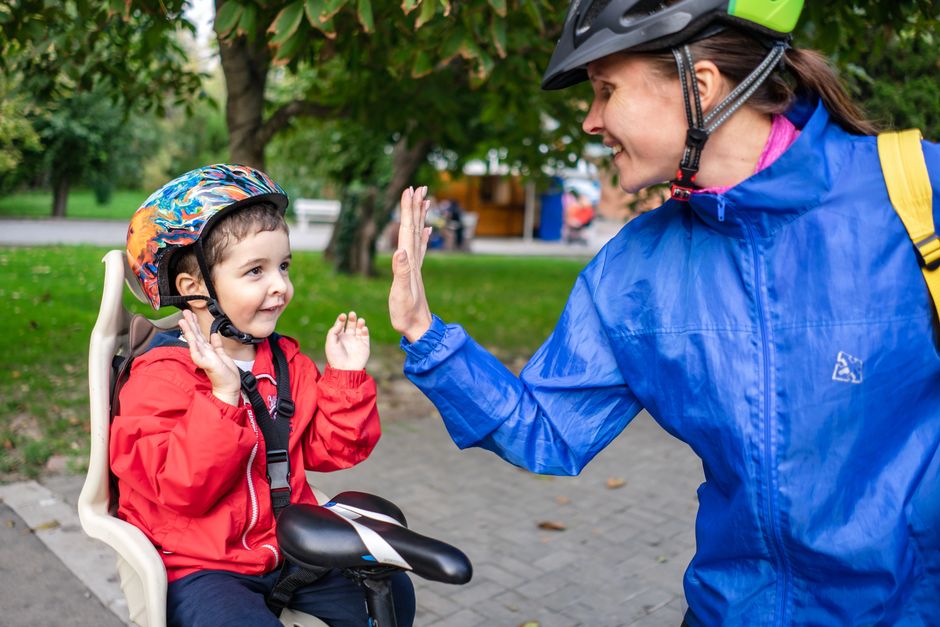
When I’m helping parents get their child buckled in, I have a little ritual. I reach over, pull the slack out of the webbing, and begin counting. Click. Click. Click. I always count the clicks out loud. If you aren’t hearing a distinct, secure engagement, you haven’t tightened it enough. A child seat harness should be snug—not uncomfortable, but there should be zero "pinchable" slack in the webbing.
Correcting the Chest Clip Position
One of the most common mistakes I see involves the chest clip (or sternum clip). Parents often push this down toward the stomach to make it easier to buckle the child in. This is a massive safety error. The chest clip must be positioned at armpit level. If it’s too low, the straps can slip off the shoulders during a hard stop or a tip-over, rendering the entire harness system useless. If it’s too high, it hits the chin/neck area, which is a major distraction and irritation for the rider.
Age-by-Age: Finding the Right Rig
Safety starts with choosing the right vessel for your child’s current developmental stage. You cannot force a child into a seat they aren’t ready for, and you shouldn't assume one style fits all.
Age/Development Recommended Setup Key Concern Infants (6-12 months) Trailers with infant inserts Neck support and vibration dampening Toddlers (1-3 years) Rear-mounted or Mid-mount seats Harness security and helmet fit Preschool (3-5 years) Cargo bike or sturdy rear seat Weight limits and center of gravityIf you are still in the trailer phase, you have a bit more margin for error regarding head support, but the harness rules remain the same. Once you move to a seat, the stakes climb significantly. You are now responsible for the weight distribution of the bike. If you are mounting a seat on a questionable rack—one that isn't rated for the weight or isn't compatible with your frame—you are playing a dangerous game. Read the manual! I know, I know—"it looks easy." But the manual contains critical torque guidance that dictates exactly how tight the mounting bolts should be. Loose bolts lead to sway, and sway leads to accidents.
The Helmet Fit Checklist: The "Two-Finger Rule"
I get genuinely annoyed when I see a toddler riding with a helmet that looks like a hat tilted back on their head. If the forehead is exposed, the helmet is not doing its job. I keep a tiny checklist on my phone for pre-ride checks, and helmet fit is always number one.
- The Two-Finger Rule: There should be no more than two fingers’ width between the child’s eyebrows and the edge of the helmet. If it’s higher, it will slide back and leave the frontal lobe unprotected in a crash. The "V" Shape: The straps should form a perfect "V" just under the earlobe. If they are dangling loose or bunched up, the helmet will rotate on impact. The Chin Strap: This is my biggest pet peeve. If I can fit more than one finger between the strap and the child's chin, it’s too loose. A loose strap allows the helmet to be knocked off before it ever touches the pavement.
The Pre-Ride Checklist: Don't Skip It
As a professional who spent years observing mechanical failures, I can promise you that pre-ride checks save lives. When I head out with my own kids, I pull up the note on my phone and run through these steps every single time. Yes, even if I rode the bike yesterday. Especially if I rode the bike yesterday.
Mount Integrity: Check the rack bolts and the seat clamp. Give it a good firm shake—if the seat moves on the frame, the bike moves on the road. Tighten to the manual's specific torque guidance. Harness Tension: Pull the strap webbing. Ensure the child isn’t wearing a thick, puffy winter coat (which creates a massive gap between the child and the harness). If it’s cold, put the coat on over the harness or use a blanket. Chest Clip Position: Verify it is exactly at armpit height. Helmet Strap Snugness: Check for "helmet drift." If it can tilt to the side, it’s too loose.Why Following the Manual Matters
I hear it all the time: "I’ve been riding for years, I know how to bolt a seat on." My response? "Do you have the torque wrench? Did you check the clearance for the rear brake cable?"

Manufacturers spend millions of dollars testing these seats. When they tell you that a seat is only compatible with specific rack widths or frame materials, they aren't just trying to upsell you. They are mitigating the risk of the plastic fatigue that comes from improperly mounted hardware. When you mount a seat on a "questionable rack"—one that wasn't designed to handle the dynamic load of a squirming toddler—you are creating a pivot point that can fail under stress. Don't skip the installation steps just because it "looks easy." Your child’s safety isn't a DIY project; it's an engineering requirement.
The Transition to Independence
As your child grows, the conversation changes. When they move from a rear seat to a cargo bike, or eventually to their own bike, the "tightness" of the gear remains the constant. We teach them that safety equipment is not an optional accessory. It is the price of admission for the freedom of the ride.
Whether you are using a top-of-the-line Thule seat or a budget-friendly option, the physics of the ride remain the same. The harness is their primary safety system. If you take the time to ensure it is adjusted correctly—if you take the extra two seconds to count those clicks—you are setting a tone of safety that will last them a lifetime.
Remember: If you aren't sure, go back to the manual. If you’re still not sure, take it to your local shop and ask one of https://www.parenting/when-can-a-baby-go-in-a-bike-seat-an-age-by-age-guide/ the service writers. We’ve all been there, and we’d much rather see you walk through our door with a safety question than an emergency.
Now, go check those straps. Click, click, click. Enjoy the ride.